This post may contain affiliate links which won’t change your price but will share some commission.
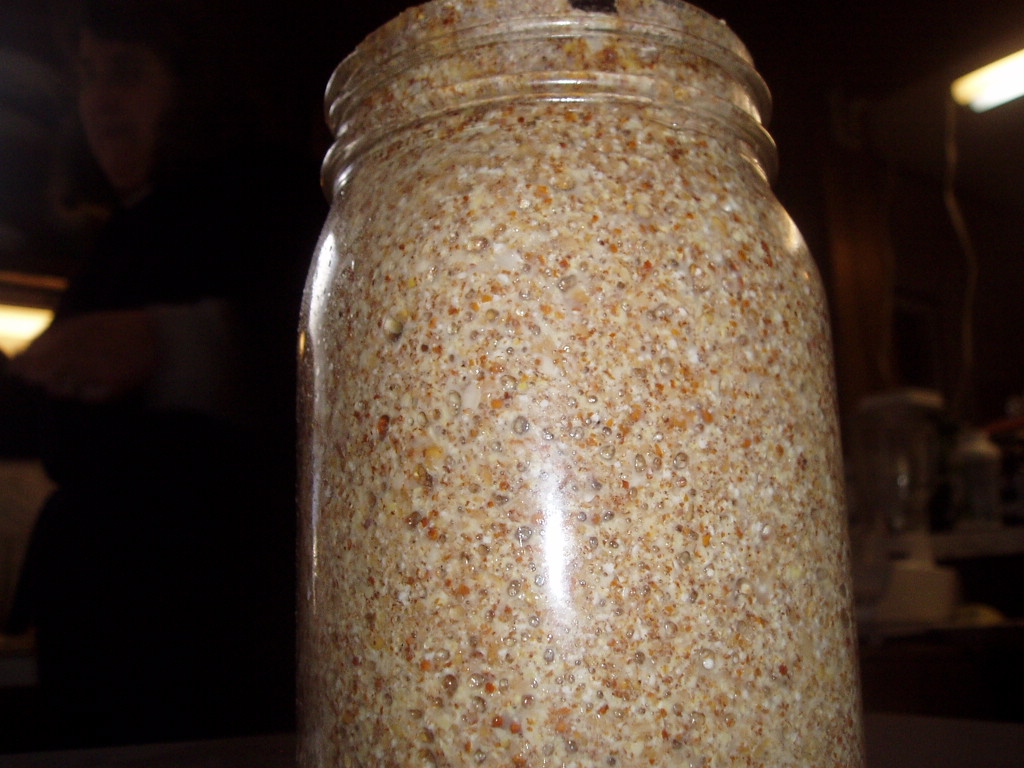
I have to confess right off that I have not made this sourdough starter. I have had the good fortune of knowing someone else, my sister-in-law, Denise, who has given me both the starters I have. She started my quinoa sourdough starter In December and shared it with me at Christmas time. I have carefully questioned her about all the steps involved and shared it here because she does not blog. So I get to share her wisdom and experience for you on my site. the image here are my starter which I have successfully kept alive for a month now and used to make bread 3 times in January.

1. Mix together 1 cup quinoa flour and 1 cup water (make sure it is not chlorinated water) and make a slurry. Add in 2 organic red cabbage leaves (very important these are organic so as not to get pesticides into your starter) cut into strips. You can also add a few tsp. of kombucha or water kefir. Set it out overnight.
2. Stir and add 1/2 cup flour and water and stir some more. Continue to stir throughout the day. Keep in a warm place.
3. Feed it again the next day and continue stir periodically. You should start to see some bubbles in the mix.
4. Feed for 2 more days and continue to stir and look for bubbles. once it active and bubbling you may remove the cabbage, but keep it on hand, just in case it is needed. The starter needs to be VERY active with lots of bubbles. A clear jar (Mason type) will make this so much easier to observe. In an active culture the air spaces will be so close together that they will almost touch.

5. Continue to feed but now do it 2x/day with quinoa flour and flax meal in a 3 to 1 ratio (3/4 cup quinoa and 1/4 cup flax meal) and equal amounts of water to the flour. (The flour to water ratio will be the same when you make the bread.)
6. Once you have worked up to a starter of more than 3 cups you are ready to make the quinoa sourdough recipe I have in this post. Just make sure you leave enough starter to work with for your next batch of bread in a week or two.
7. This starter may be refrigerated if you don’t need it for awhile. It is wise to try and feed it once a week if you if you don’t use it. And when you are ready to make another batch of bread, pull it out of the fridge and feed it for 2-3 days until it is bubbly and active. It will need to be brought up to room temperature first in order for the flour to be consumed by the starter and grow.
 If you have made a GF sourdough starter and have some tips to add, please do in the comments below. If you have never made one before and decide to try this one, let me know how it goes. I would love to hear of your project.
Shared at Healing With Food Friday, Natural Family Friday, Wellness Wednesday, Wildcrafting Wednesday.

Looks cool! Might have to try this sometime!
Thank you for sharing this with many GF folks and with Wildcrafting Wednesday!
Thank you for sharing this instructional guide! I am a few days in and my starter seems to be active.
I’m wondering, will develop that yeasty smell that I associate with my gluten starter?
Thank you!
That is exciting that your starter is doing well. Congratulations. And yes it should start to develop more of a yeasty smell as it is still gathering wild yeasts out of the air. Different flours do smell a bit different but they all gather the yeasts so will get a similar kind of odor. Give it time.